Mission Electronics produced some of the most musically satisfying speakers of the 1980s and 1990s. The 70, 752, and 761 models in particular occupy a special place in British hi-fi history — affordable, beautifully voiced, and capable of performance that embarrassed speakers costing twice the price. Owners who track down a pair today and find the foam surrounds have perished are in excellent company: Mission speaker foam repair is one of the most popular restoration jobs we see, and it's deeply satisfying to bring these classics back to life.
Mission Foam Surround Deterioration: What to Expect
Mission used polyurethane foam surrounds on their cone drivers throughout the late 1980s and 1990s. Depending on storage conditions, these typically last 15–25 years before deteriorating. Common signs include: crumbling or brittle foam around the cone edge, distortion or buzzing at moderate volumes, loss of bass weight, or a visible gap where the surround has separated from the cone or basket. In advanced cases the surround is entirely absent.
The repair is a straightforward foam replacement — you do not need to recone the driver or send it away for service.
Mission Models and the Right Kit
Mission produced drivers in three main sizes for their 700 and 700S series. Always measure the outer diameter (OD) of your existing surround before ordering — this is more reliable than going by the nominal speaker size.
- Mission 752, 761, 70, 70-MK2, 70MK2, 70-S (6.5" woofer): Mission 752/761/70 Series 6.5" Foam Repair Kit — £8.95
- Mission 710, 763, 700S, 210/700, SPCG3D (8" woofer): Mission 710/763/700S 8" Foam Repair Kit — £8.95
- Mission 720, 730, 730 MK, 750 (10" woofer): Mission 720/730/750 10" Foam Repair Kit — £9.95
Each kit includes a matched pair of foam surrounds (enough for both speakers in a pair), T7000 adhesive, an applicator brush, and step-by-step instructions.
Step-by-Step: Mission 752 and 761 Foam Repair (6.5" Woofer)
The 752 and 761 are the most commonly requested Mission repairs. The 6.5" woofer is accessible, straightforward to work on, and the improvement in sound after a foam replacement is immediately noticeable.
Tools Required
- Mission 6.5" foam repair kit
- Isopropyl alcohol (90% or higher)
- Cotton swabs or lint-free cloth
- Phillips screwdriver, plus a small flat-head for residue removal
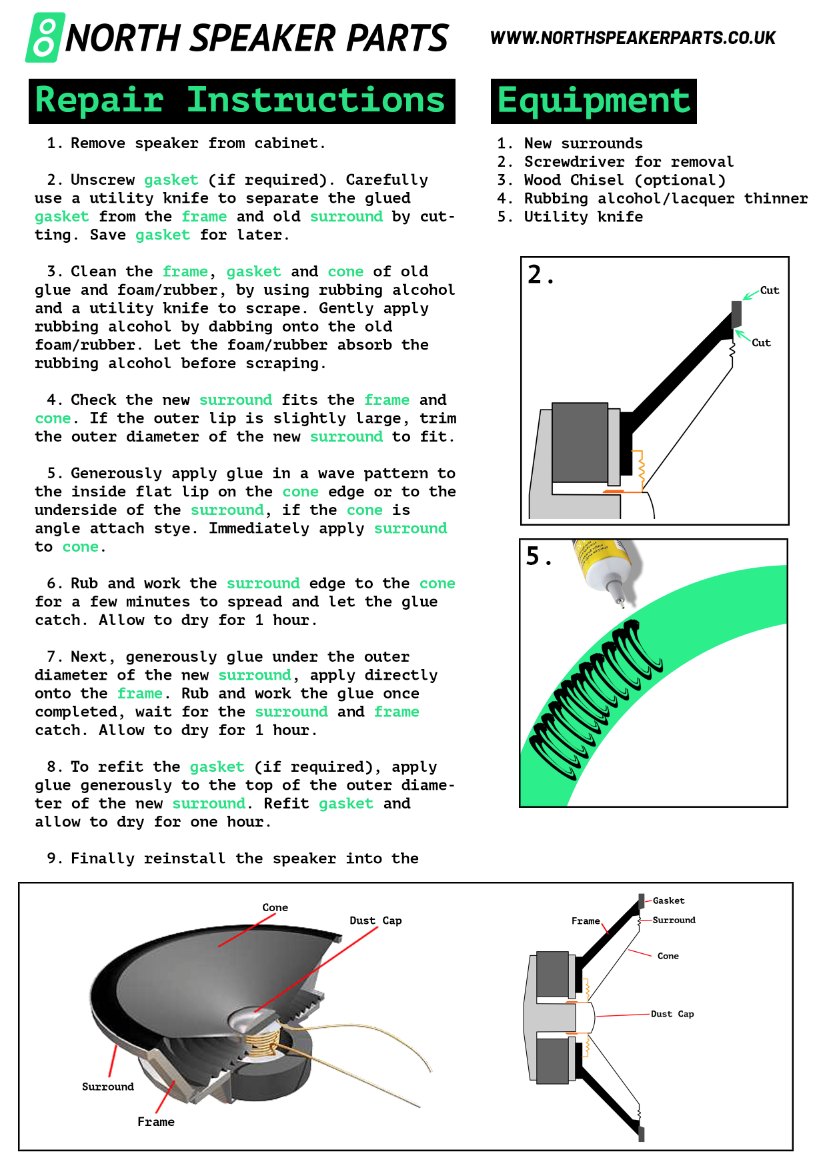
1. Remove the Grille and Driver
The 752 and 761 grilles clip onto the baffle with press-fit pegs — pull from a corner and work around the frame. Unscrew the woofer (four screws on the 752, typically). Tilt the driver forward to access the wiring. Mission used push-on spade terminals in this era — grip them with finger and thumb and pull straight off. Note which wire is positive before disconnecting.
2. Strip the Old Surround
Peel off the degraded foam. It will likely come away in pieces and may leave a residue on the cone edge and basket rim. Use a flat spatula to lift any remaining fragments, then clean both surfaces thoroughly with isopropyl alcohol. The cone edge on Mission drivers from this era is often paper-based — clean carefully to avoid lifting the cone material itself. Allow both surfaces to dry for at least 10 minutes before applying adhesive.
3. Dry-Fit and Check
Before applying any glue, place the new 6.5" foam surround over the driver to confirm fit. The outer edge should rest on the basket rim, and the inner edge should sit naturally on the cone edge without bunching or stretching. This dry fit is your quality check — if the surround doesn't sit right, contact us before proceeding.
4. Bond the Outer Edge to the Basket
Apply a thin, even bead of T7000 adhesive around the basket rim. Seat the outer edge of the surround into the adhesive and press gently. T7000 has a working time of 5–10 minutes before it begins to grab. Use this window to confirm the surround is sitting level and concentric. Once you're satisfied with the position, hold or weight it for a few minutes to encourage initial bonding.
5. Centre the Voice Coil and Bond the Inner Edge
Apply a thin bead of T7000 to the inner edge of the surround. This is the most important step of the repair. Lower the cone into position, then press it gently downward with your fingertip and release — it should return to rest evenly with no resistance or contact from the coil. If you feel or hear any scraping, the voice coil is touching the gap: shift the cone position slightly and re-test. Once the coil is moving freely, press the inner surround down onto the cone edge firmly.
6. Cure and Reinstall
Leave the driver flat on your workbench for 24 hours. Once fully cured, reinstall in the cabinet, reconnect the wiring (check polarity), refit the grille, and test at low volume. A correctly repaired Mission 752 or 761 will reproduce bass that is full, tight, and completely free of distortion — exactly as it sounded when new.
The Mission 70 MK2: Worth the Extra Care
The Mission 70 MK2 is one of the great budget audiophile speakers of the late 1980s. Its 6.5" woofer responds well to foam replacement, but the voice coil gap is tighter than on later Mission drivers — take extra care during the centring step. The results are worth it: a correctly restored 70 MK2 is a genuinely capable speaker by any standard. Our Mission 70 MK2 6.5" repair kit is matched to the original driver specification.
Shop All Mission Foam Repair Kits
All kits are UK-stocked and dispatched the same day on orders placed before 4pm. Free UK delivery via Royal Mail 1st Class. Browse the full Mission speaker repair kit collection or go straight to your size:
- Mission 752 / 761 / 70 Series 6.5" Foam Repair Kit — £8.95
- Mission 710 / 763 / 700S 8" Foam Repair Kit — £8.95
- Mission 720 / 730 / 750 10" Foam Repair Kit — £9.95
Not certain which kit fits your Mission model? Contact us with your model number and we'll confirm the correct kit before you order.