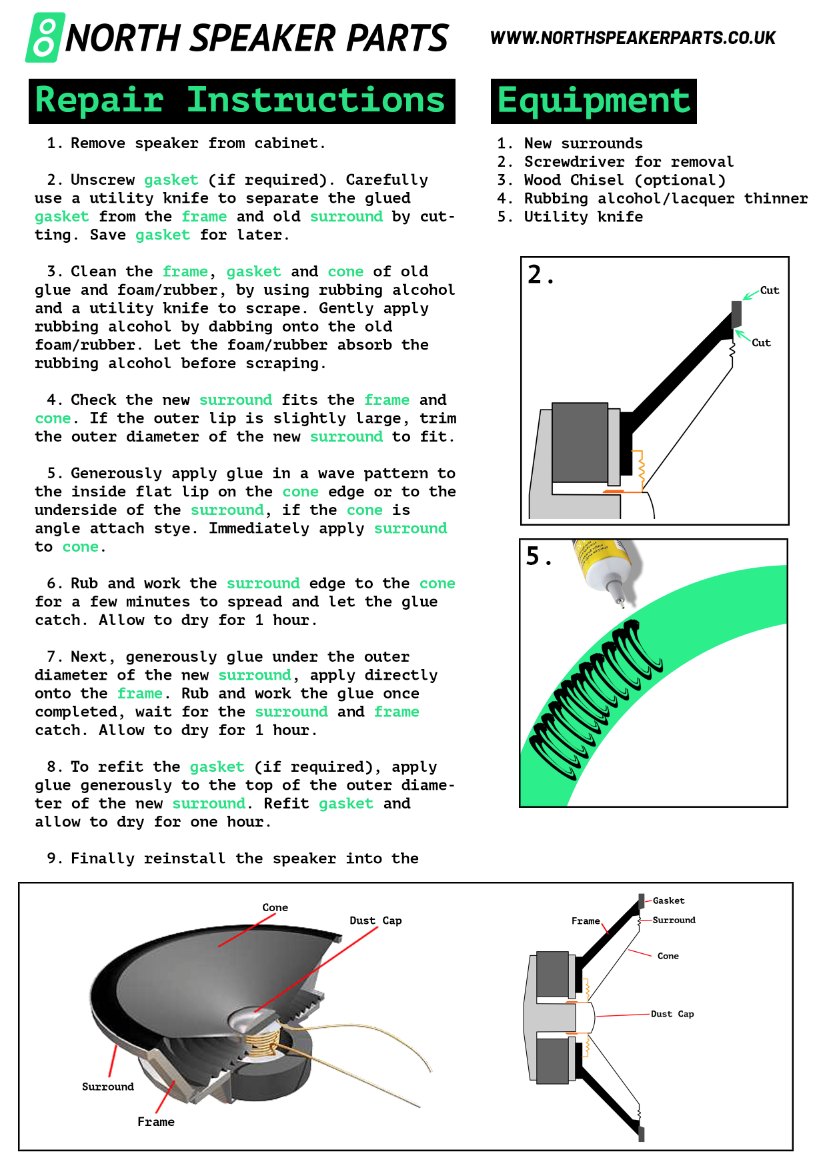
Bowers & Wilkins (B&W) built its reputation on engineering pedigree, and that reputation is well earned — models like the CM2, CM4 and the CW0086 driver used across several ranges are prized for their accuracy and detail. But the rubber and foam surrounds on these drivers don't last forever. Once they split, crack or perish, even a well-cared-for pair of B&W speakers will sound thin, distorted or rattly. The good news is that re-edging a B&W driver is a straightforward home repair.
Signs Your B&W Surround Needs Replacing
Look closely at the ring connecting the cone edge to the driver basket. Rubber surrounds typically crack or split with visible tears, while foam surrounds crumble, flake or develop holes. You may also notice reduced bass output, buzzing at low volumes, or a cone that sits visibly off-centre or moves unevenly when pressed gently.
Which B&W Repair Kit Do You Need?
B&W used both rubber and foam surrounds across different eras and ranges, so check which material your original driver used as well as the outer and inner diameter before ordering:
- B&W CM2, CM4, 6" drivers (rubber surround): Bowers & Wilkins CM2/CM4 6" Rubber Repair Kit
- B&W CW0086, 5" drivers (foam surround): Bowers & Wilkins CW0086 5" Foam Repair Kit
Each kit includes a matched pair of surrounds, T7000 adhesive, an applicator brush and instructions. We also stock a genuine-style B&W badge for grilles that have lost theirs.
Step-by-Step: B&W Surround Replacement
Tools Required
- B&W foam or rubber repair kit
- Isopropyl alcohol (90% or higher)
- Cotton swabs or lint-free cloth
- Phillips or flat-head screwdriver
1. Access the Driver
Remove the grille and unscrew the driver from the baffle. Disconnect the wiring terminals, noting which wire connects to positive before you disconnect.
2. Remove the Old Surround
Peel or scrape away all remnants of the old surround from both the cone edge and the basket rim. Clean both surfaces thoroughly with isopropyl alcohol and allow to dry completely — any residue left behind will stop the new surround bonding properly.
3. Bond the Outer Edge
Apply a thin, continuous bead of T7000 to the basket rim, then position the new surround's outer edge into the adhesive. You have roughly 5–10 minutes of working time to check it sits flush and even all the way round.
4. Centre the Voice Coil and Bond the Inner Edge
Apply T7000 to the inner edge of the surround. Gently depress the cone with two fingers and release it — it should return to centre with no rubbing or scraping. Once centred, press the inner edge down onto the cone firmly.
5. Leave to Cure for 24 Hours
Allow the adhesive a full 24 hours at room temperature to reach maximum strength before reinstalling the driver and testing at low volume.
Shop B&W Repair Kits
All kits are UK-stocked with same-day dispatch on orders before 4pm and free UK delivery via Royal Mail 1st Class. Browse the full Bowers & Wilkins repair kit range, or get in touch if you're unsure which kit matches your model.